Dear Wovember Readers, tonight’s post and tomorrow’s post will go back to the Working With Wool theme, as we managed to get a last-minute contribution from Ian Tait, who runs IST Crafts. When I started out with spinning, I learnt on a drop spindle, and I didn’t get on with the cheap spindle I had at the time. Then fellow Wovemberist Felicity let me play with her Ian Tait spindle, and I never looked back. It turned out I wasn’t the only fan of his spindles, and I found a “Show off your IST Spindle” thread on the Ravely Spindle Candy group. Ravelry member Chewiedox asked Ian a lot of interesting questions, which I have been given permission to reproduce in tomorrow’s post; with updates from Ian, as that original interview is now about four years old. More things have changed since, as Ian now also has his own Ravelry group. Today, we will hear about Ian’s background in his own words.
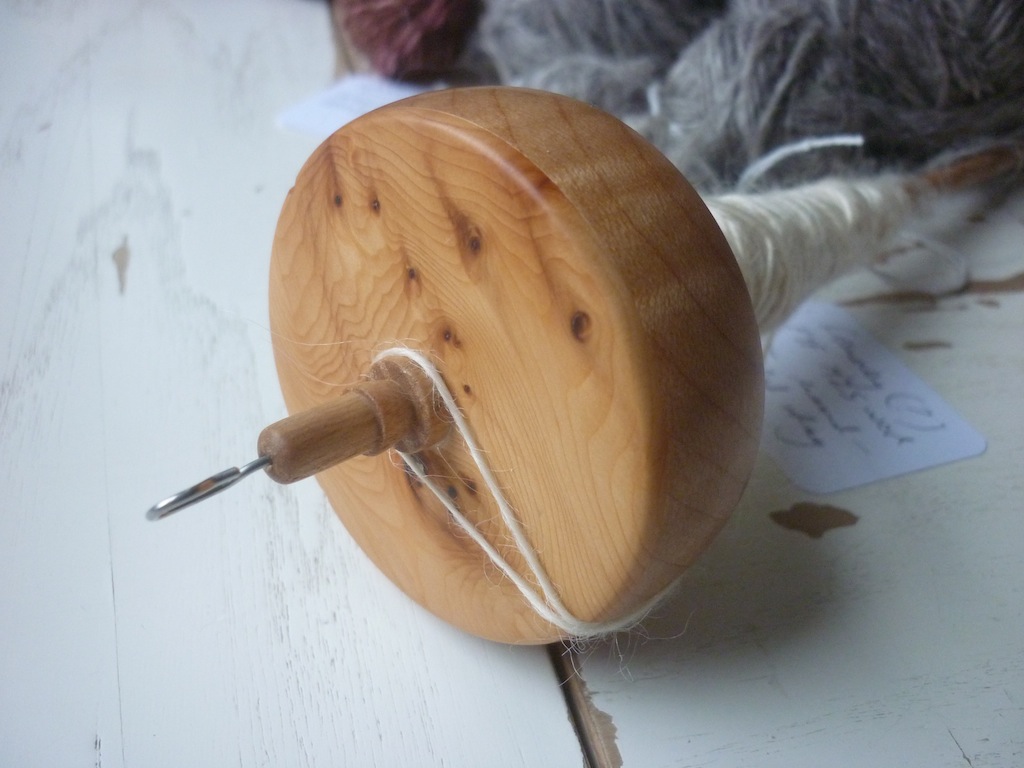
Tom’s IST Spindle in pippy yew
Based on the Isle of Wight I am a former IT project manager in the defense industry. But after changing companies 7 times in 10 years without even ‘changing desks’ I found myself working as a sub-contractor on the site I served my apprenticeship at, for a company I had never heard of before. Not liking their culture, when they offered me “voluntary” redundancy and I accepted.
I wanted to do something more akin to my personal philosophy so I went to WestDeanCollege in Sussex to learn the art of making early stringed musical instruments. I think life sometimes has its own plans for us and it was here that the seeds of my current business were sown. One tea break, I happened to mention to the tapestry weaving tutor that I did a bit of wood turning. Well, next tea break she showed me a small turned item. OK! I started to get worried as I didn’t realize that they had a problem with Vampires in West Dean. So I started making tapestry bobbins for the college weaving students (I still supply the craft shop at West Dean).
To try and earn some spending money whilst at collage I set up a small web site selling the tapestry bobbins. I then received a phone call from a lovely lady somewhere in the far and distant North (unfortunately I have lost her contact details) who asked me if I had ever made drop spindles. I spent several happy months sending boxes of my first attempts at drop spindles to her and her group of spindlers and getting feedback, making changes, and learning.
On finishing the course at West Dean the reality of instrument making became apparent. Not wanting to do just repair work for very little money, I tried to set up a small company making electric guitars with another former student. Well, after a year or so of designing and setting up a small workshop, he had to leave for personal reasons. So I moved back to the Isle Of Wight.
Here, I rented a small industrial unit and set up my workshop. I decided to ‘get back into’ my turning, which I enjoy. Already having some experience I concentrated on making items for the “fibre crafts”.
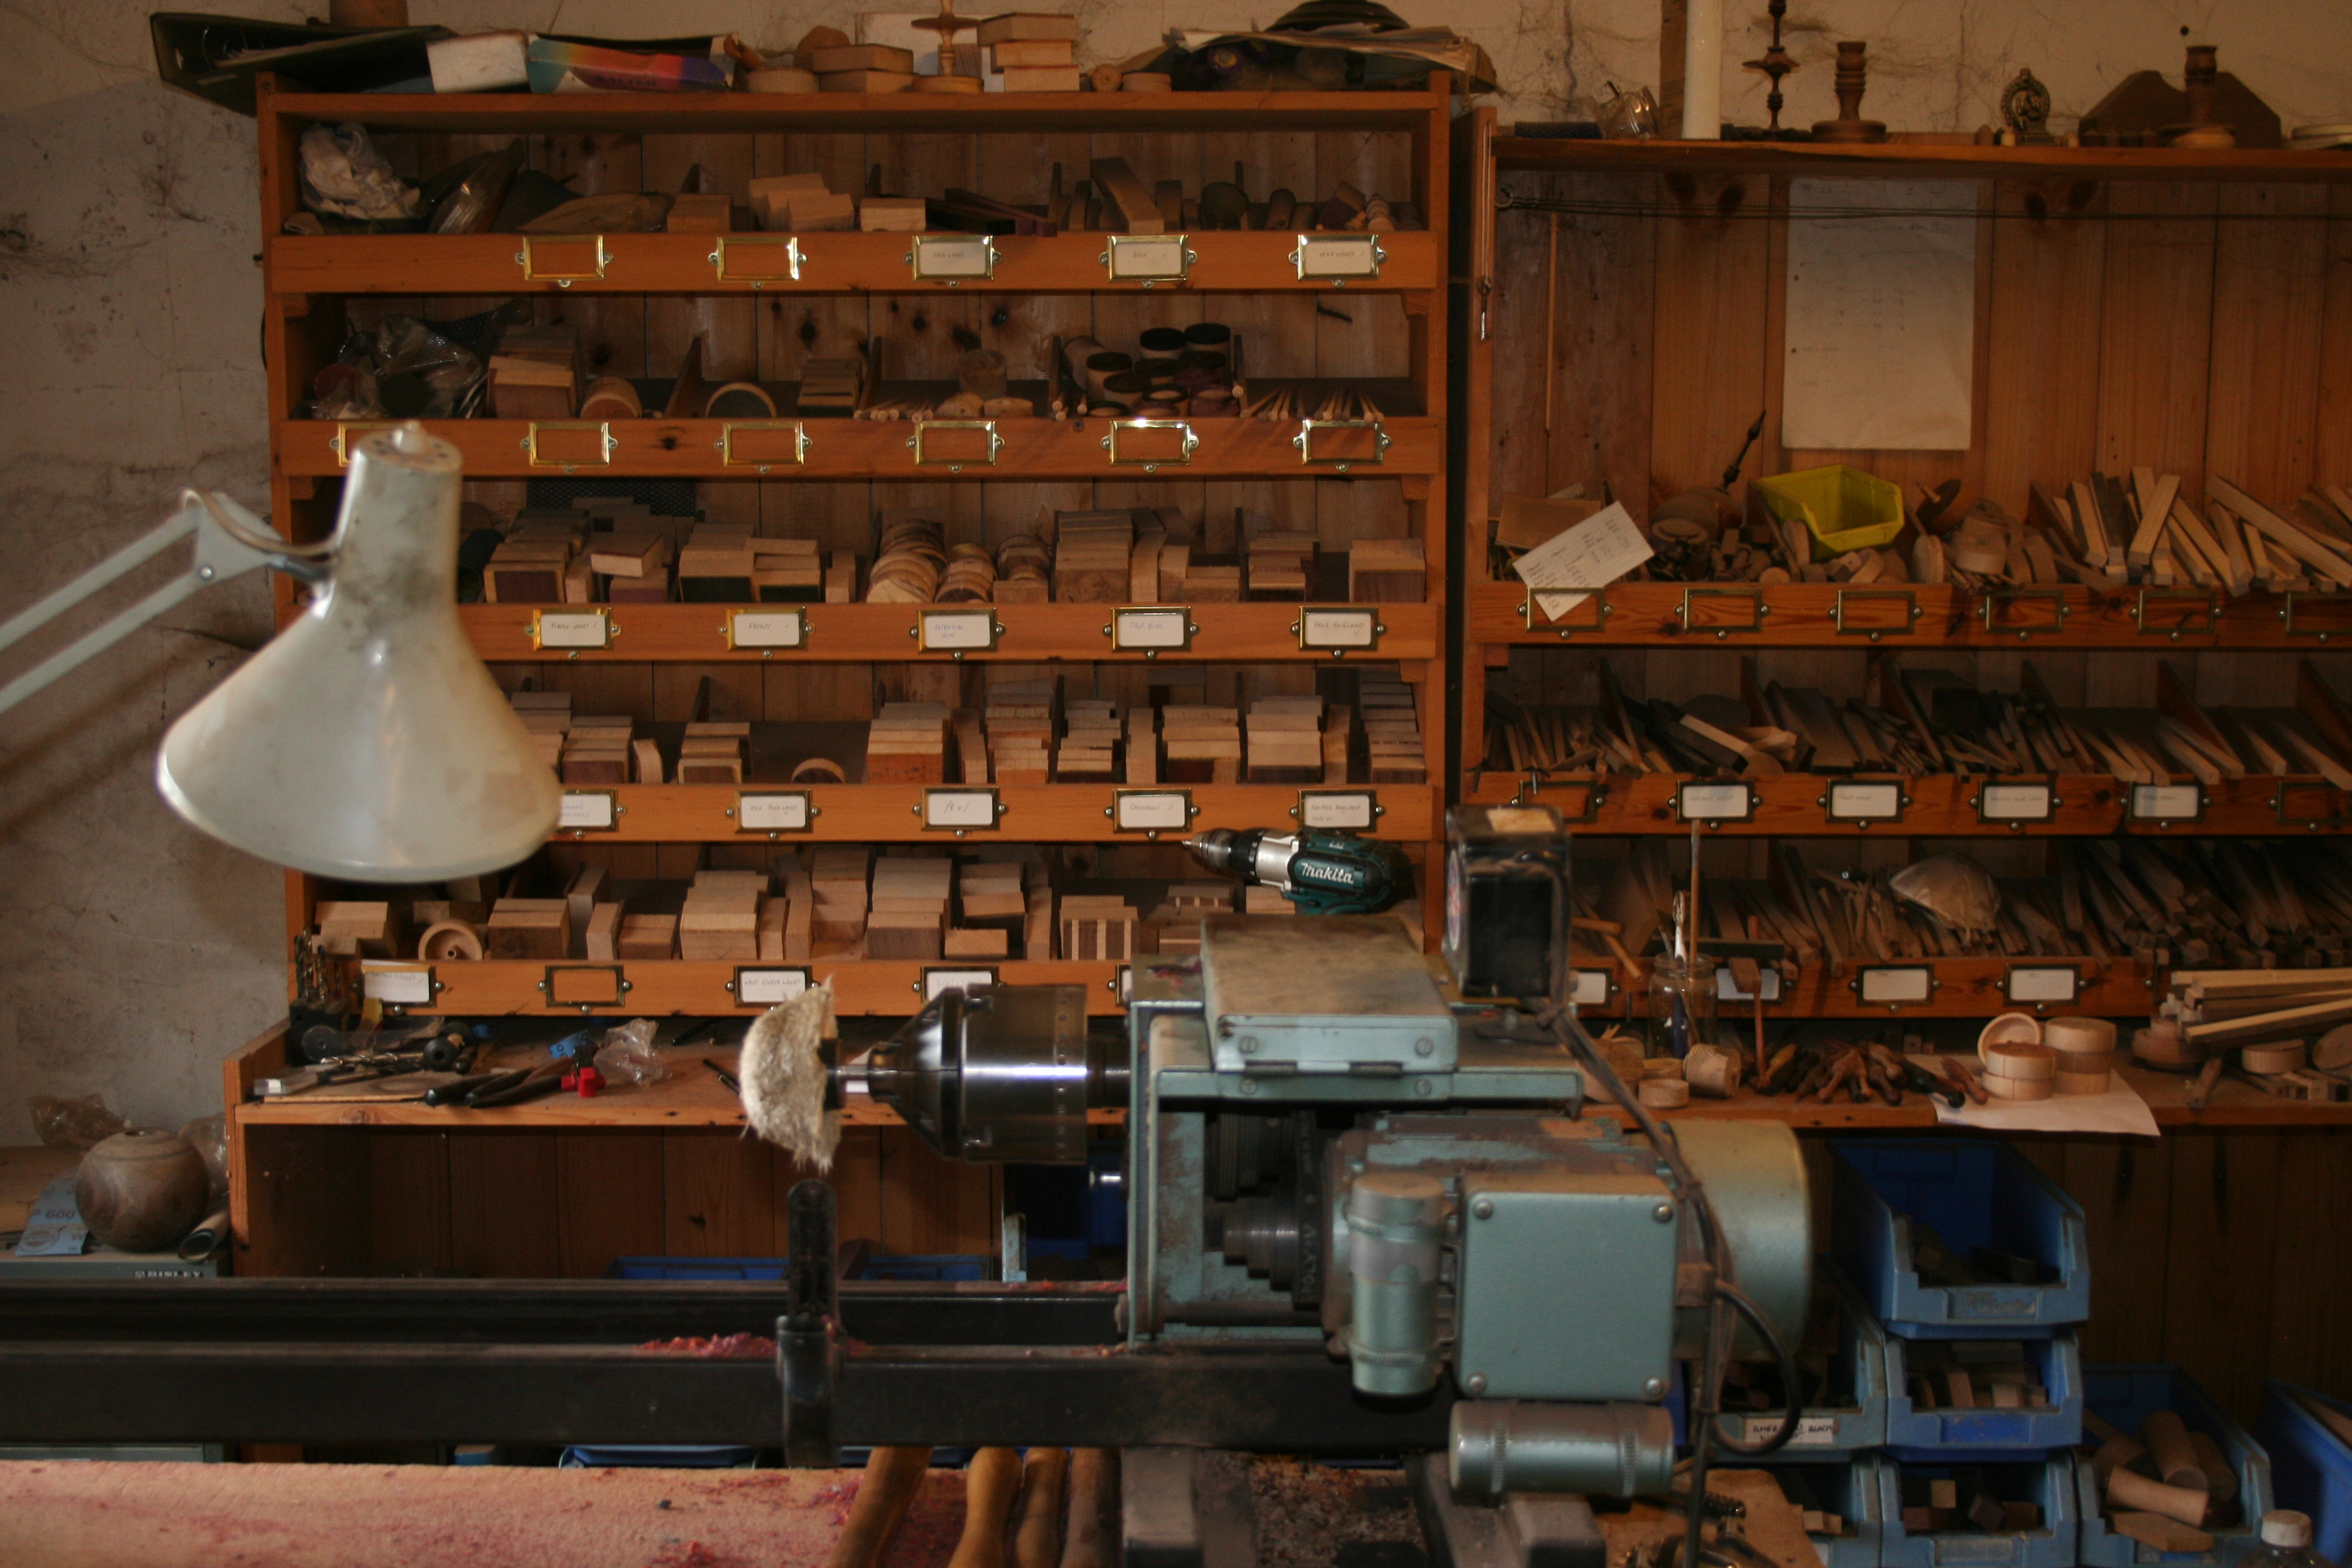
Ian’s workshop, with loads of tasty parts of spindles! image ©Ian Tait
I started by refining the design of the tapestry bobbins making small changes to the shape and in particular the brass tips. Still one of my favorite items to make the clean lines and form show the wood to great effect. I currently make three types, two with the option of solid wood or a brass tip, the third comes with a brass tip as standard. The brass I use is CZ121 which is what is termed an Alpha/Beta alloy. Which means that is has over 35% Zinc and is lot harder than normal brass. I have just developed a range of slim line bobbins and have been pleased with their reception at the fibre shows. I hope to introduce these to the web site shortly.
Next the drop spindles.
I had a number of criteria when designing these, first was to produce a tool of a professional quality that would stand along side those from the US. Second was the consideration of the environmental impact. Running along side these was the build quality, with the goal of achieving some thing similar to when I was building a viola da gamba at collage.
With the assistance of Carol and Pete Leonard and Beverly Usher, who very kindly agreed to “test fly” my prototypes for me I settled on my current design.
The design is of a rim weighted form. All those shown on my web site are top whorl but I am happy to make a bottom whorl for any of the timbers shown. Nearly all my whorls are a laminate of the display wood on a base of Ripple Sycamore with some on Elm. For the laminating I use the same skills I learnt at collage when fitting finger boards. All the joints are hand planes to exact tolerances. I use a proprietary brand aliphatic resin glue which is water clean up, has good properties on the more oily woods and much better longevity than PVA. This ensures a very strong joint with no glue line and enables me to under cut the centre section to 4/5 mm so enhancing the rim weighting effect. Another advantage of this design is that where most of the whorl is of the base wood it enables me to achieve a consistent weight and is not so dependant on the varying weight of the display wood. I am thus able to offer spindles at an exact (give or take a gram or so) weight at no extra charge. The laminating also helps with the stability of the whorl and helps prevent cracking which would be more likely if it were solid. The slightly curved shape of the sides of the whorl, both internal and external, also help to produce a very stable form. I leave a smallish ‘plug’ of wood in the centre to provide a good length for the joint with the shaft. This joint being very critical for smooth spinning. I drill the hole for the joint on my lathe which was made in the UK and is very accurate. I continually monitor it for trueness. I hand cut three notches which are functional but not intrusive. I take extra care in the finishing of them with the under side being sanded to 600 grit and the external surfaces to 1200 grit and burnished.
All my shafts are hand turned (no dowel here). For the shafts I have settled on three timber, English Ash, English Ripple Sycamore and American Black Walnut. I take particular care when selecting my wood but even more so when selecting my shaft wood. Looking for well seasoned straight grained timber. I use an old chiller room as my wood store which provides an ideal stable environment for storing wood. I tend to buy my wood in bulk which enables me to season the timber further. I then cut this into billets which are further seasoned. For the design I wanted to achieve a fairly fine thickness and settled on 7.5mm for the 70 & 75mm, 7mm for the 60mm and 6.5 for the 50mm. These measurements are of the joint thickness. The shaft are slightly tapered so aid removal of the fibre. The joint is initially cut just over size to a tolerance of .1mm using a pair of digital calipers. I also cut a small notch in the bottom just incase someone wants to use it as a bottom whorl. The finial is a representation of an acorn with a small shoulder to aid the trueness of the fit. The shafts are then individually fitted to the whorl. Again I use the aliphatic resin glue.
The hook is a traditional shepherds crook design. After talking to a number of ‘professional’ spindlers I felt that this was the best. I use one mm stainless steal which is fine but robust. I hand form all the hooks varying the size with smaller hooks for the lighter spindles and larger for the heaver ones. These are fitted using ‘super’ glue. This provides a good bond but which can be broken so enabling a replacement hook to be fitted.
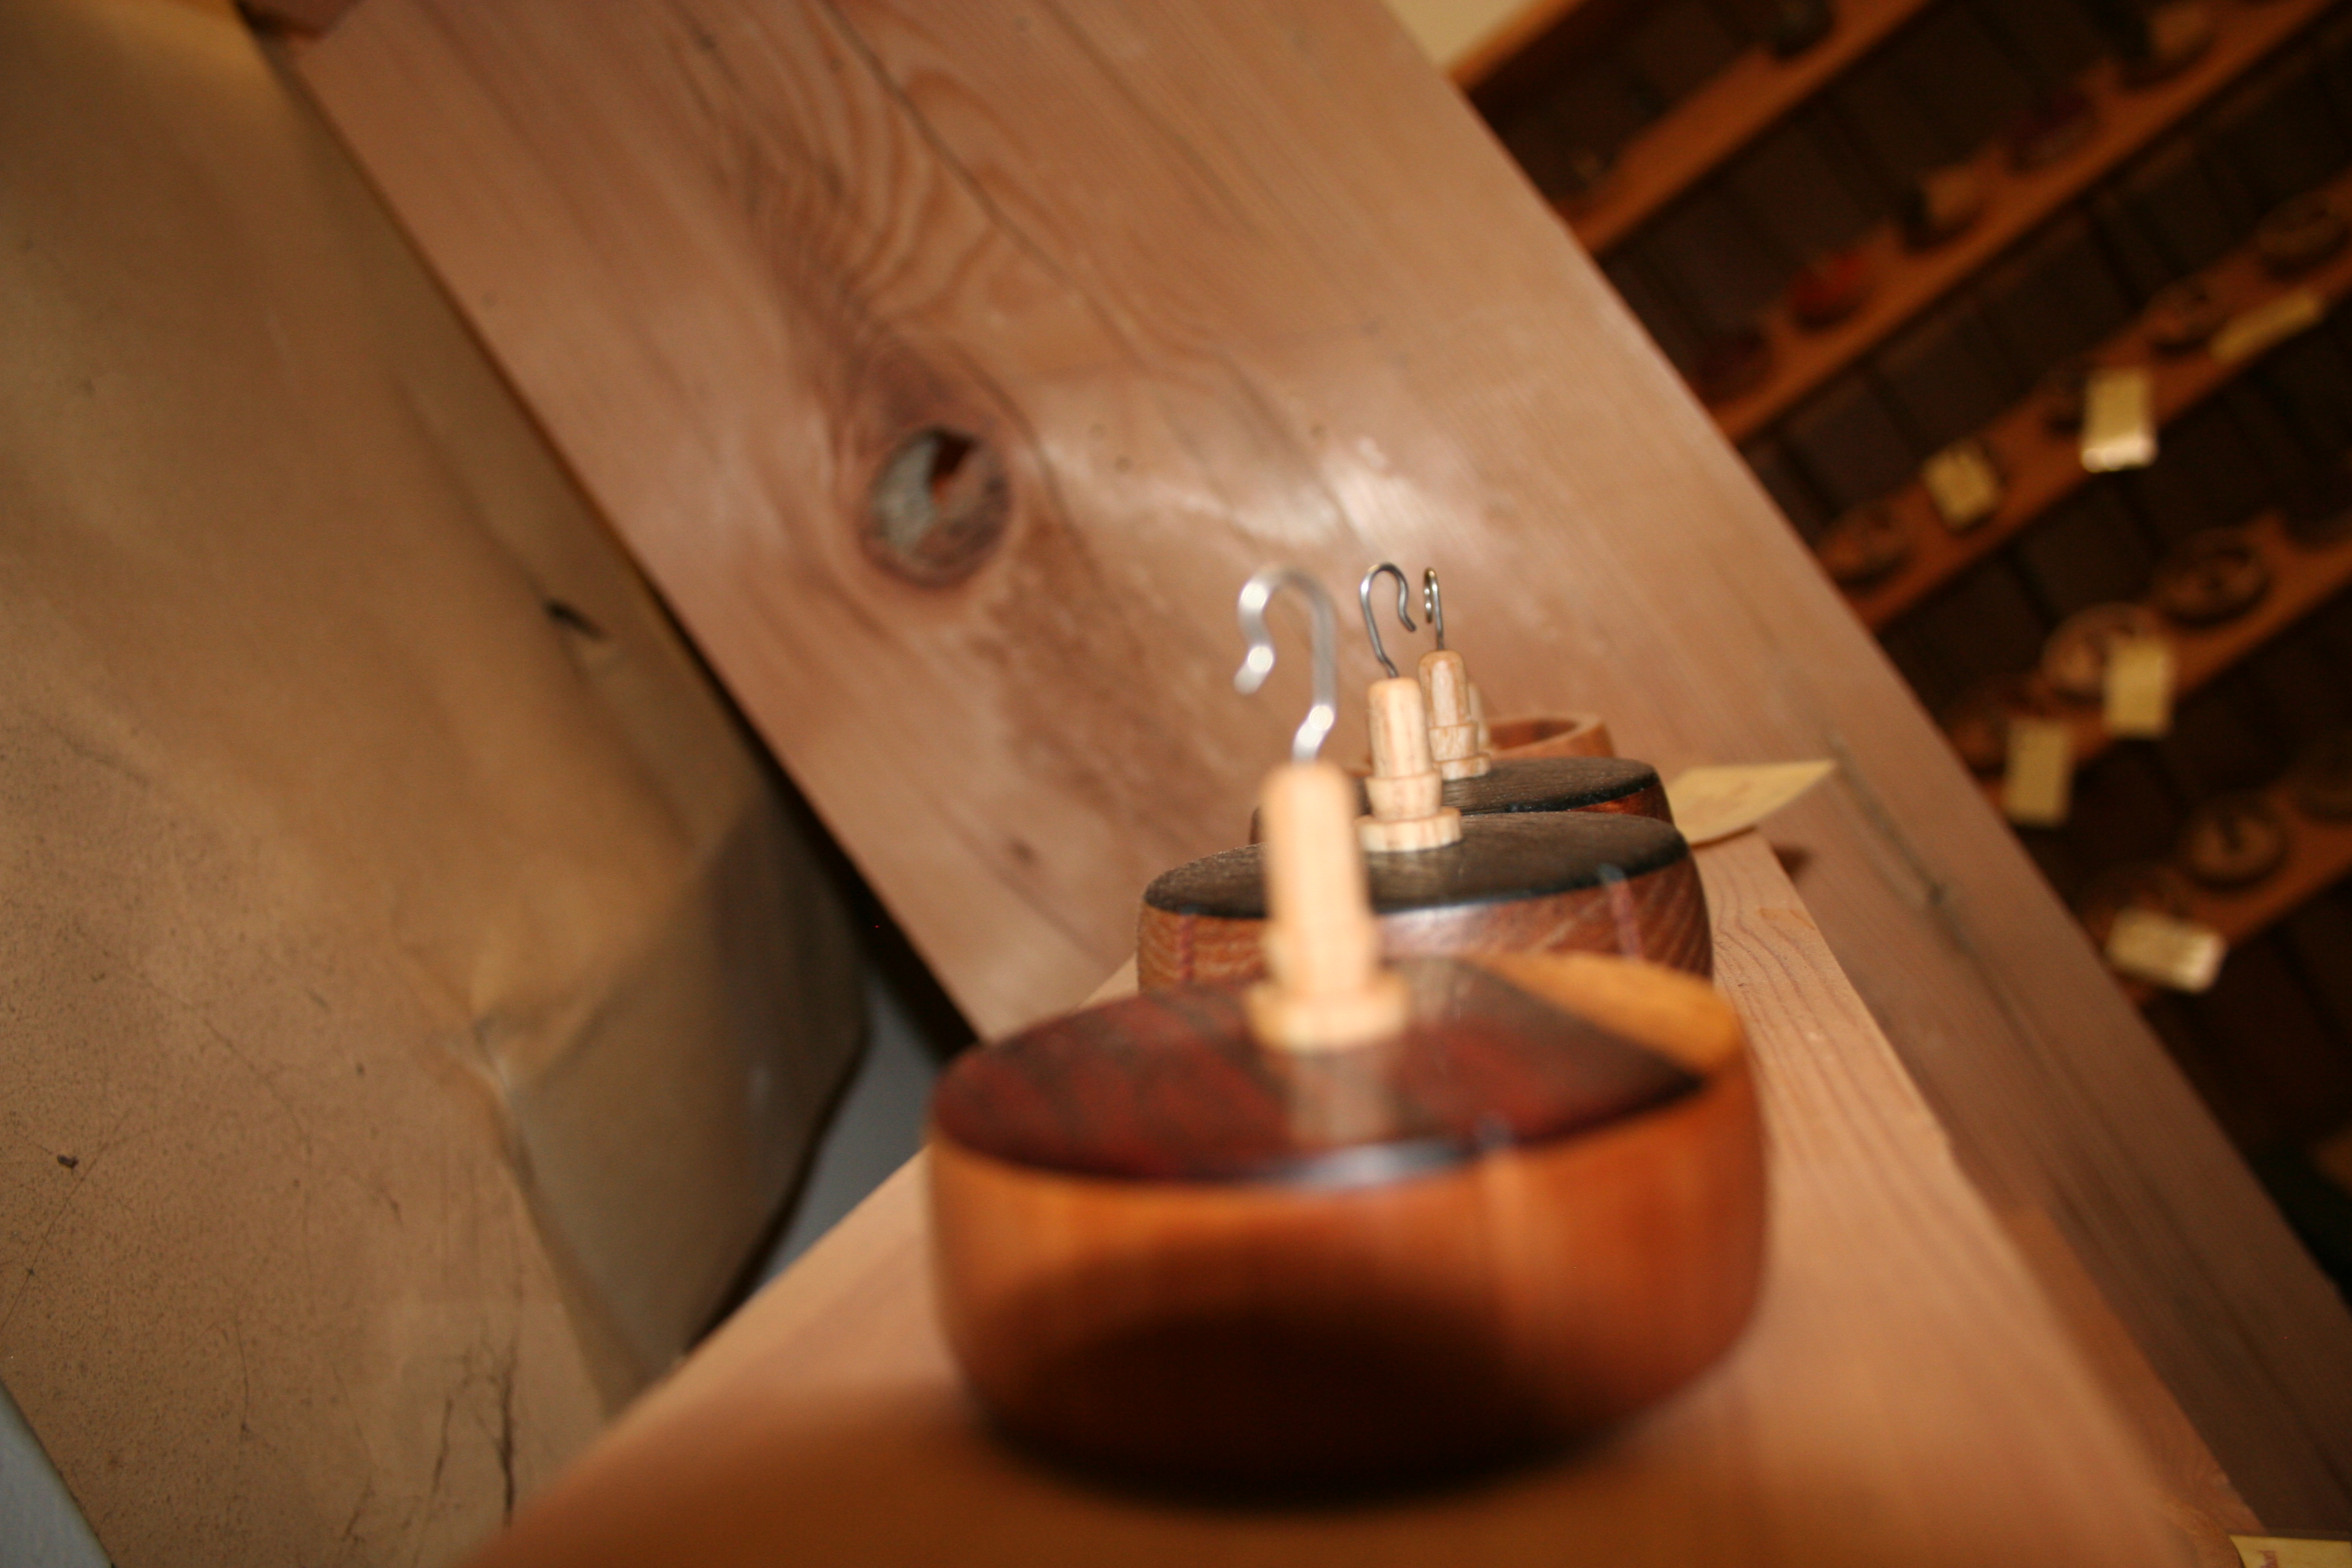
Ian’s drop spindles have a shepherd’s crook-shaped hook. Image ©Ian Tait
Once assembled the spindles are given a final sand and checker for trueness. I then apply two coats of oil. I use my own mix based on pure Tung oil. I use oil on the drops as it sinks in and becomes part of the timber maturing in much the same way. In the drying process the oil forms long chain molecules which interweave in themselves and around the cells of the timber. Two coats of a Bee and carnauba wax are applied and finally buffed. This forms the basis for a finish that will mature with age developing it own patina, especially with the addition of the lanolin from the fibre.
From the Drop spindles I have developed my range to include Turkish, Russian and Tibetan spindles. All have been developed with the same care that I have taken with my Drop spindles. Many with features unique to IST Crafts such as the brass weights in some of the Turkish spindles.
I have also just invested in a small Oxyacetylene torch and have started making Tahkli.
I plan to update my web site in the next few weeks and include some associated items such as thread counters and Nostepinnes.
I am not an expert at spinning but I can spin fairly consistently on a drops and Turkish. If I get time I want to learn on a Russian or Tibetan over this winter. As I feel that there is nothing like using the tool to help with the design.
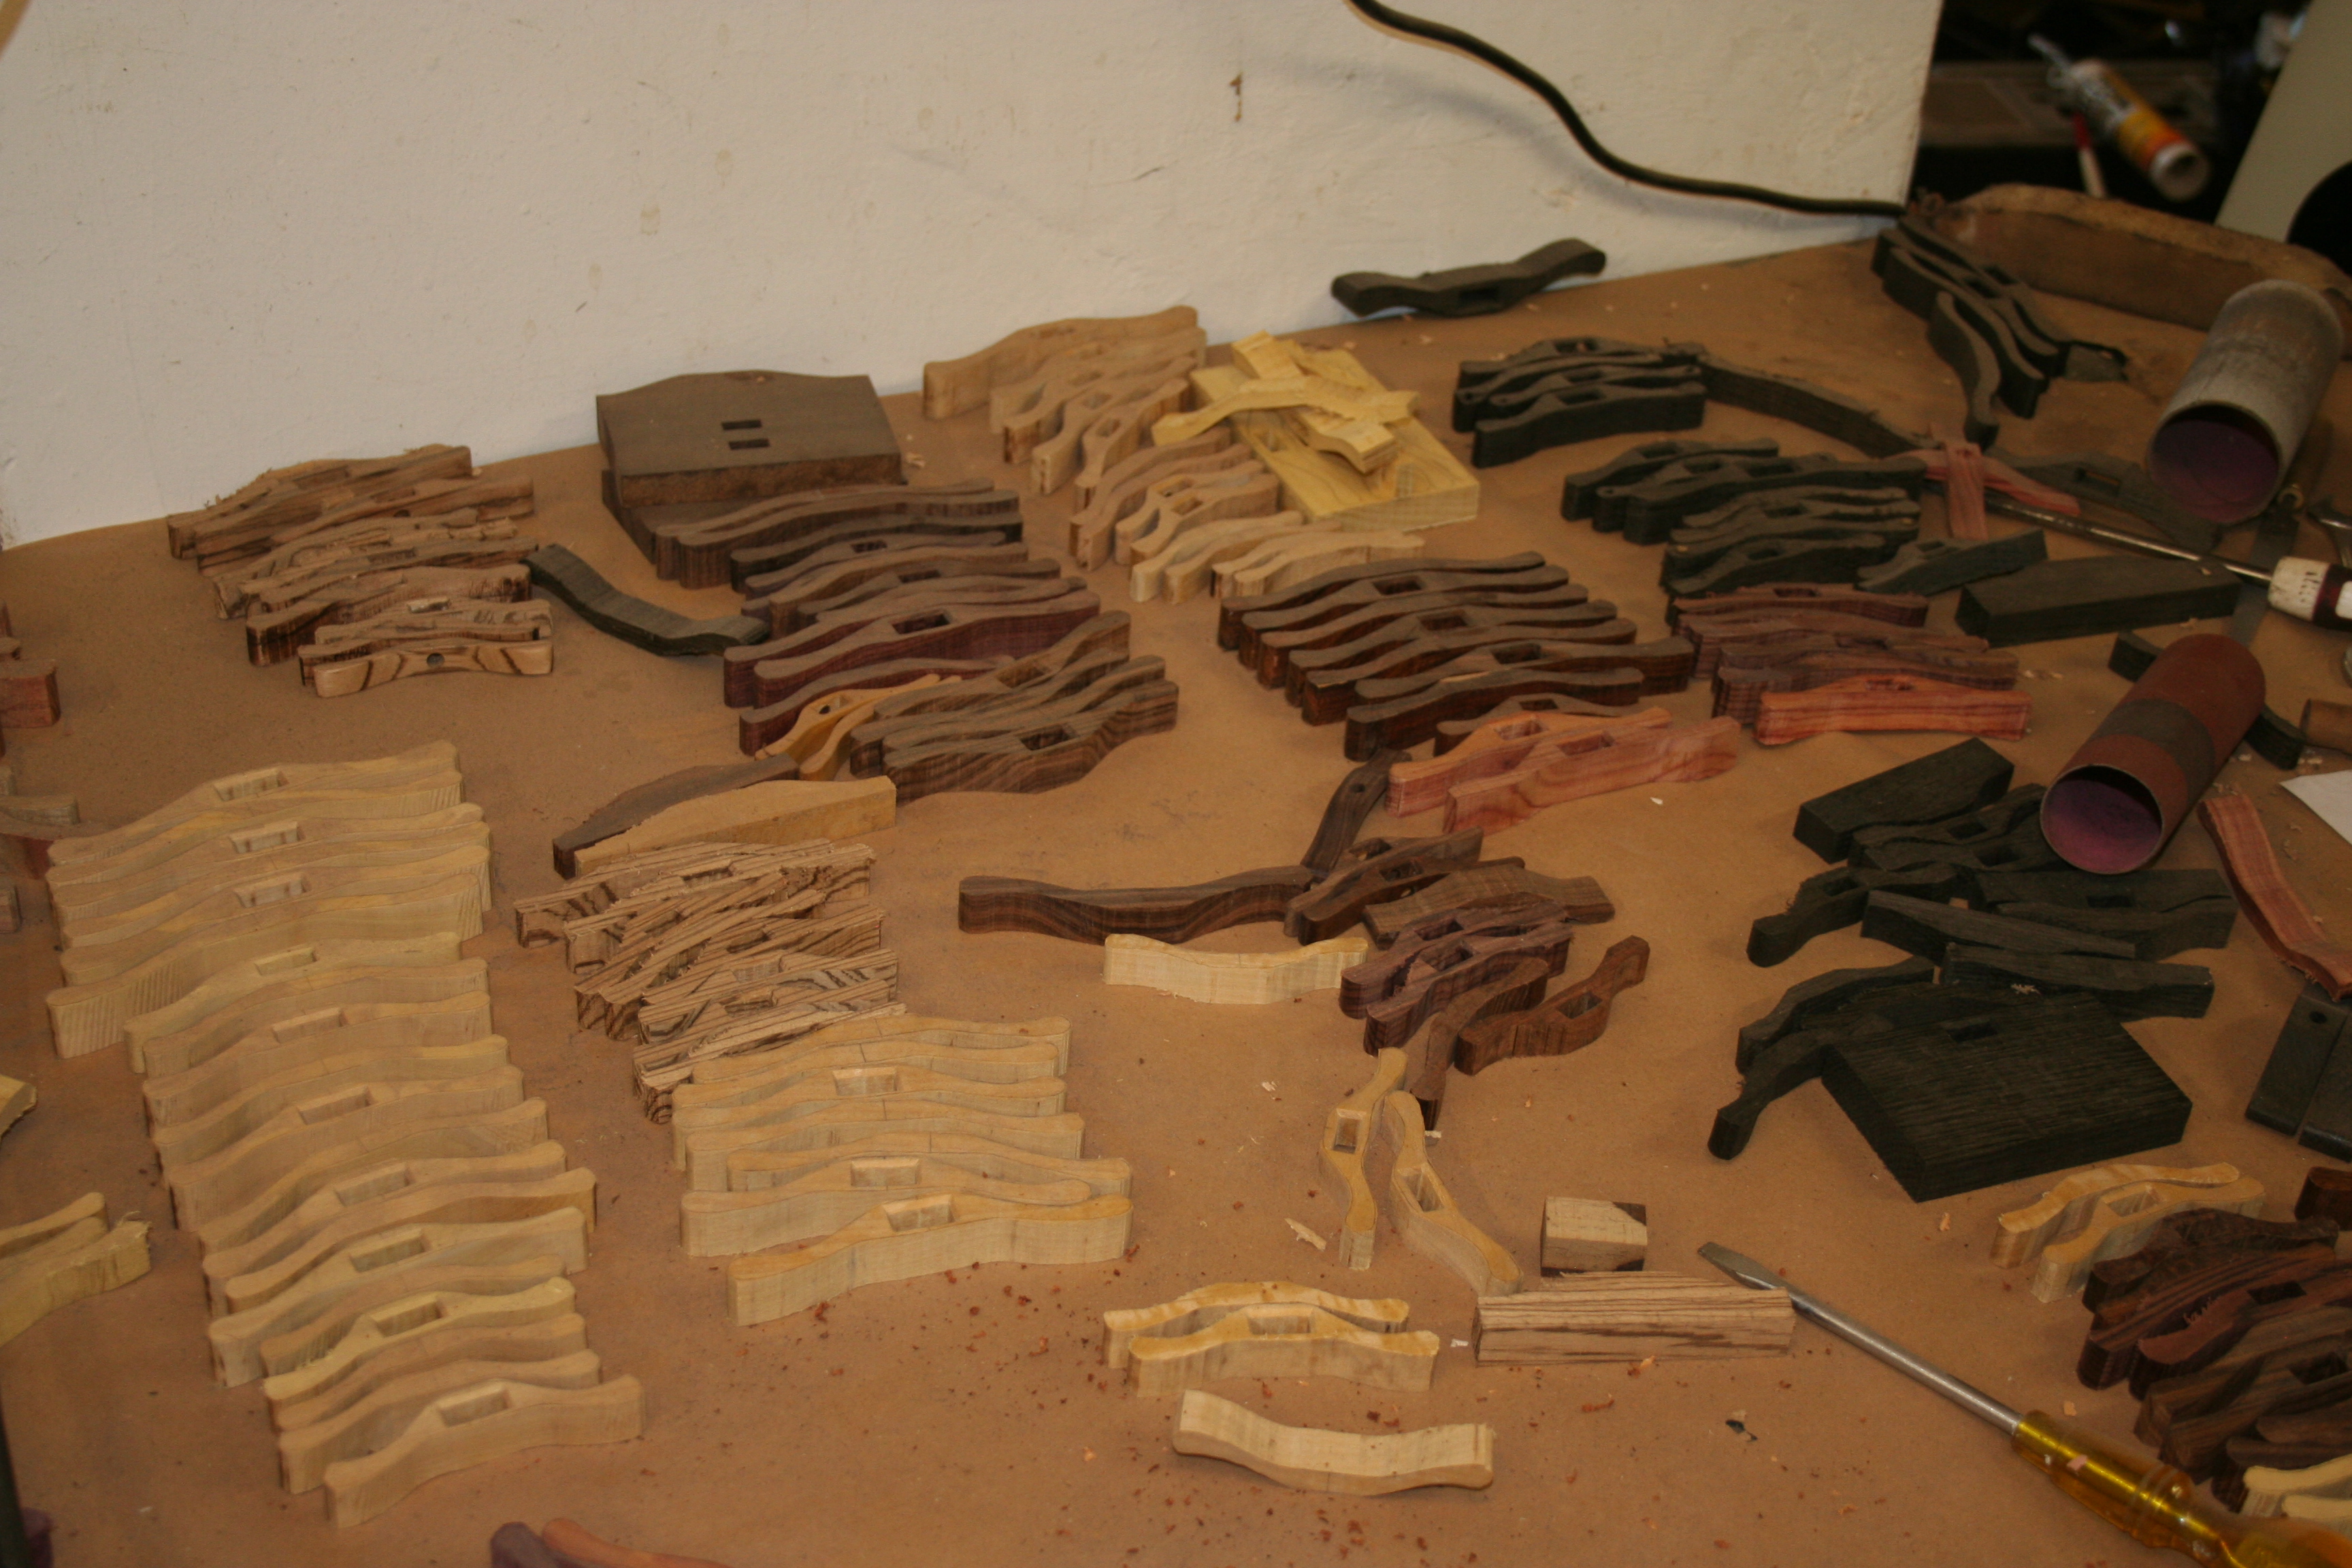
Turkish spindles in the making, image ©Ian Tait
Be sure to check back in tomorrow, when we will feature Chewiedox’s interview!